new Vue ( { } )

first Vue!
—更新于2017.10.30


Premier

html

1
2
<script src="vue.js"></script>
<!--直接script引用-->
1
2
3
<div id="first">
{{ test }}
</div>

js

1
2
3
4
5
6
7
8
// firstVue.js !
// helloVue!
var first = new Vue({
el:'#first', // el---为实例提供挂载元素。值可以是 CSS 选择符,或实际 HTML 元素,或返回 HTML 元素的函数。
data:{
test: 'Hello Vue ! '
}
})

Deuxième

模板语法

文本插值

Mustache语法(双大括号)

1
2
3
<div v-on:click="add" id = "second" class="normal">
message : {{ msg }}
</div>
1
2
3
4
5
6
7
8
9
10
11
12
var second = new Vue({
el:'#second',
data:{
msg2: ' 1 '
},
methods:{
add:function(){
this.msg2++;//this指向vue对象
console.log(this.msg2);
}
}
})

可以用v-once只渲染一次,但其绑定的事件依然在执行.
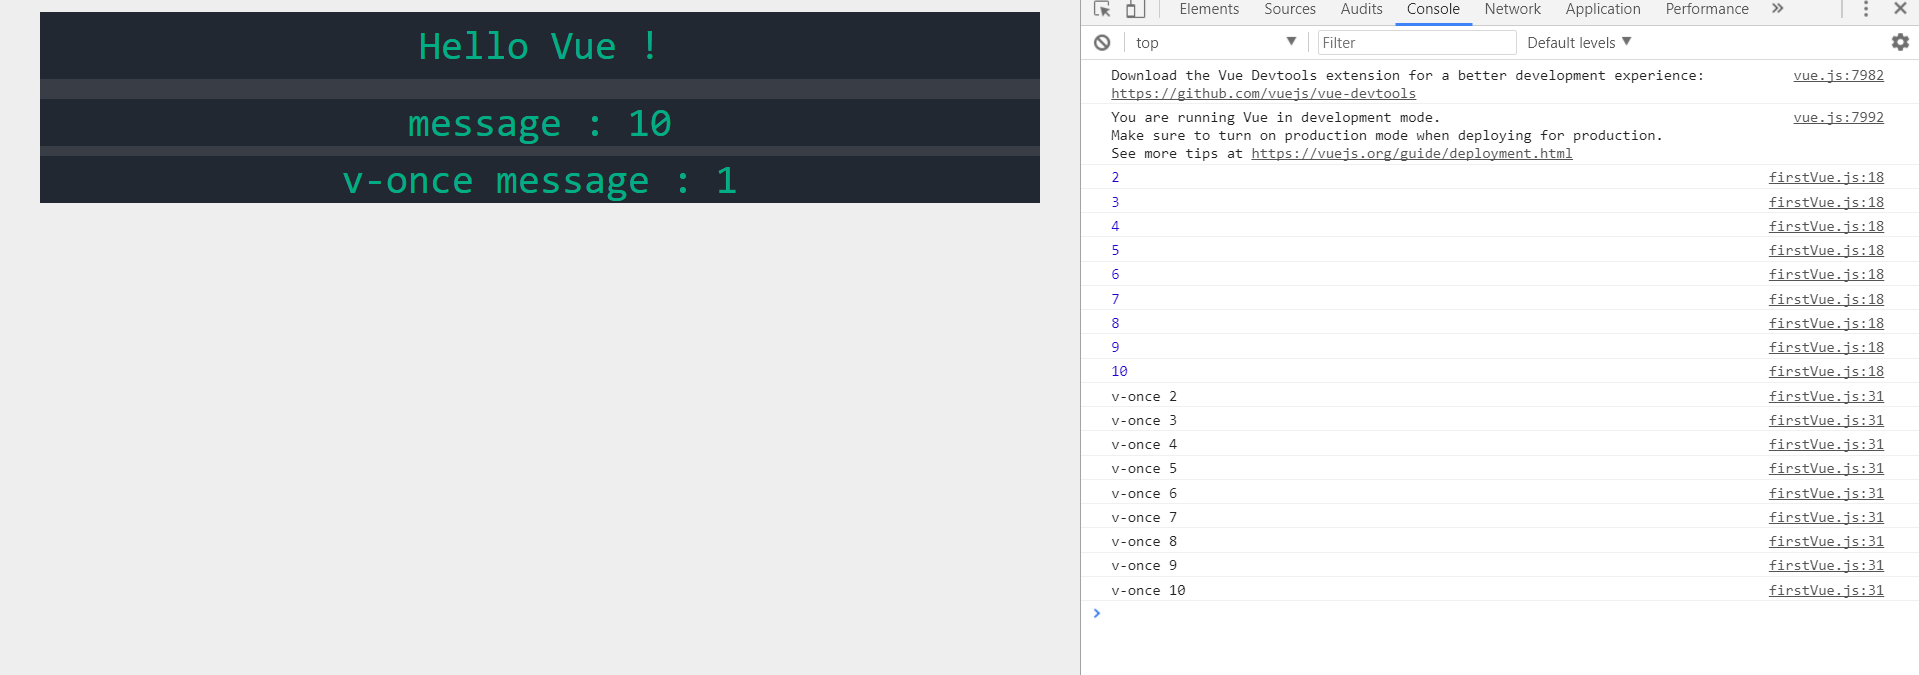
原始HTML

加v-html以取消对Mustache的解析

1
<div v-html = "rawHtml" id = "three" class="normal">{{test}}</div>

1
2
3
4
5
6
7
8
var three = new Vue({
el:'#three',
data:{
test: ' 显示出来就错了 '//rawHtml代替test
rawHtml: '<p>{{right}}</p>'
}
})//需要定义rawHtml,代替div中内容
//动态改变html会有xss攻击的隐患

使用JavaScript表达式

每一个只能包含一句表达式
如:

1
{{ message.split(" ").reverse().join(" ") }}

1
<div v-bind:id=" 'list-' + id "></div>

不能出现var等语句,if也不行(可以用三目运算符)

指令

有v-开头的就是指令(Directives)

修饰符

Modifiers,指出一个指令应该以特殊方式绑定

缩写

v-bind: “ : ”
v-on: “ @ ”


Troisième

计算属性与观察者

计算属性

computed

1
2
3
4
5
6
7
8
9
10
11
var four = new Vue({
el: '#four',
data: {
message: 'hello'
},
computed:{
reversedMessage: function(){
return this.message.split('').reverse().join('') //olleh
}
}
})

用方法也能达到效果:

1
2
3
4
5
methods:{
reverseMessage: function(){
return this.message.split('').reverse().join('')
}
}

计算属性绑定了原来的属性,并缓存第一次计算结果,如果属性没变,就不会再计算
但是方法在每一次重新渲染都会调用.

Watch 属性

能用计算属性就不要用watch

1
2
3
4
5
6
7
8
9
10
11
12
13
14
15
16
var five = new Vue({
el:'#five',
data: {
firstName: 'John',
lastName: 'Smith',
fullName: 'John Smith'
},
watch:{
firstName: function(val){
this.fullName = val + ' '+ this.lastName
},
lastName: function(val){
this.fullName = this.firstName+ ' ' +val
}
}
})

其实用computed更简洁方便:

1
2
3
4
5
computed:{
fullName:function(){
return this.firstName + ' ' + this.lastName
}
}

计算属性也有set

1
2
3
4
5
6
7
8
9
10
11
12
computed:{
fullName:{
get:function(){
return this.firstName + ' ' + this.lastName
},
set:function(newValue){
var names = newValue.split(' ')
this.firstName = names[0]
this.lastName = names[names.length-1]
}
}
}

需要注意的是Date类型数据不是依赖型数据,watch和computed不会变的,只有methods可以改变
Watch能做到Computed做不到的是watch能在观察过程中执行异步操作等开销较大的操作


Quatrième

Class相关

对象语法

1
2
3
4
<div class="static"
v-bind:class="{ active: isActive, 'text-danger': hasError }">
</div>
<!-- 与静态类并存 -->
1
2
3
4
data:{
isActive:true,
hasError: false
}

结果:

1
<div class="static active"></div>

用computed动态改变类非常强大

数组语法

1
<div v-bind:class="[activeClass, errorClass]"></div>

可以加三目:

1
<div v-bind:class="[isActive ? activeClass : '', errorClass]"></div>

数组结合对象语法

1
<div v-bind:class="[{ active: isActive }, errorClass]"></div>

内联样式

1
<div v-bind:style="styleObject"></div>
1
2
3
4
5
6
data: {
styleObject: {
color: 'red',
fontSize: '13px'
}
}

Cinquième

条件渲染

v-if

1
2
<h1 v-if = "ok">yes</h1>
<h1 v-else>no</h1>

在template中渲染一整组

1
2
3
4
5
<template v-if="ok">
<h1>Title</h1>
<p>Paragraph 1</p>
<p>Paragraph 2</p>
</template>

v-else-if同理
v-else必须在v-if或者v-else-if后面

1
2
3
4
5
6
7
8
9
<template v-if="loginType === 'username'">
<label>Username</label>
<input placeholder="Enter your username" key="username-input">
</template>
<template v-else>
<label>Email</label>
<input placeholder="Enter your email address" key="email-input">
</template>
<!-- 加key不会复用input值,每次切换都会重新渲染 -->

v-show

1
<h1 v-show="ok">Hello!</h1>

v-show简单切换CSS的display属性.
一般频繁切换用v-show

如果v-for与v-if一起使用,v-for会有更高优先级


Sixième

列表渲染

v-for

1
2
3
4
5
<ul id="example-1">
<li v-for="item in items">
{{ item.message }}
</li>
</ul>
1
2
3
4
5
6
7
8
9
var example1 = new Vue({
el: '#example-1',
data: {
items: [
{ message: 'Foo' },
{ message: 'Bar' }
]
}
})

拓展:

1
2
3
4
5
<ul id="seven" class="normal">
<li v-for="(item, index) in items">
{{ parentMessage }} - {{ index }} - {{ item.message }}
</li>
</ul>

1
2
3
4
5
6
7
8
9
10
var seven = new Vue({
el: '#seven',
data: {
parentMessage: 'Parent',
items: [
{ message: 'Foo' },
{ message: 'Bar' }
]
}
})

为了防止复用要加key:

1
2
3
4
<div v-for="item in items" :key="item.id">
<!-- 内容 -->
</div>
<!-- v-bind -->

变异方法

push()–pop()–shift()–unshift()–sort()–splice()–reverse()
e.g.

1
example1.items.push({ message: 'Baz' })

非变异方法

filter()–concat()–slice()

注意事项

Vue不能检测变动数组
如:

1
vm.items[indexOfItem] = newValue

且不能直接改变长度:

1
vm.items.length = newLength

以下方法解决问题:
1:

1
2
// Vue.set
Vue.set(example1.items, indexOfItem, newValue)

1
2
// Array.prototype.splice
example1.items.splice(indexOfItem, 1, newValue)

2:

1
2
//长度
example1.items.splice(newLength)

添加属性

1
2
3
4
5
6
7
8
9
10
11
12
13
14
var vm = new Vue({
data: {
userProfile: {
name: 'Anika'
}
}
})
//添加
Vue.set(vm.userProfile, 'age', 27)
//多个新属性的话
this.userProfile = Object.assign({}, this.userProfile, {
age: 27,
favoriteColor: 'Vue Green'
})

v-for可以取一段:

1
2
3
<div>
<span v-for="n in 10">{{ n }} </span>
</div>


Septième

事件处理

事件修饰符

v-on独有

1
2
3
4
5
6
7
8
9
10
11
12
13
14
<!-- 阻止单击事件冒泡 -->
<a v-on:click.stop="doThis"></a>
<!-- 提交事件不再重载页面 -->
<form v-on:submit.prevent="onSubmit"></form>
<!-- 修饰符可以串联 -->
<a v-on:click.stop.prevent="doThat"></a>
<!-- 只有修饰符 -->
<form v-on:submit.prevent></form>
<!-- 添加事件侦听器时使用事件捕获模式 -->
<div v-on:click.capture="doThis">...</div>
<!-- 只当事件在该元素本身 (比如不是子元素) 触发时触发回调 -->
<div v-on:click.self="doThat">...</div>
<!-- 只触发一次 -->
<div v-on:click.self="doThat">...</div>

虽然可以串联,但注意顺序:

1
2
@click.prevent.self <!-- 阻止所有点击 -->
@click.self.prevent <!-- 只阻止元素上的点击 -->

键值修饰符

1
2
3
4
<!-- 同上 -->
<input v-on:keyup.enter="submit">
<!-- 缩写语法 -->
<input @keyup.enter="submit">

所有键值别名:
enter—tab—delete—esc—space—up—down—left—right
以下为组合键,一般加上字母(字母对应的数字):
ctrl—alt—shift—meta(win)


Huitième

表单输入绑定

v-model

1
2
<input v-model="message" placeholder="edit me">
<p>Message is : {{ message }}</p>

中用文本插值是不行的,应该用v-model

复选框:

单个:

1
2
<input type = "checkbox" id = "checkbox" v-model = "checked">
<label for = "checkbox">{{}}</label>

多个:

1
2
3
4
5
6
7
8
9
10
<div id='example-3'>
<input type="checkbox" id="jack" value="Jack" v-model="checkedNames">
<label for="jack">Jack</label>
<input type="checkbox" id="john" value="John" v-model="checkedNames">
<label for="john">John</label>
<input type="checkbox" id="mike" value="Mike" v-model="checkedNames">
<label for="mike">Mike</label>
<br>
<span>Checked names: {{ checkedNames }}</span>
</div>

1
2
3
4
5
6
new Vue({
el: '#example-3',
data: {
checkedNames: []
}
})

单选按钮

略.

选择列表

略.


修饰符

.lazy

转变为在change中同步

1
<input v-model.lazy="msg" >

.number

自动将用户输入的值转化为number类型

1
<input v-model.number="age" type="number">

.trim

过滤首尾空格

1
<input v-model.trim="msg">


Neuvième

组件

全局注册

1
2
3
Vue.component('my-component', {
// something
})

注册完之后的标签可以且只能用在已注册Vue实例中

局部注册

1
2
3
4
5
6
7
8
9
10
var Child = {
template: '<div>A custom component!</div>'
}
new Vue({
// ...
components: {
// <my-component> 将只在父组件模板中可用
'my-component': Child
}
})

data必须是函数

1
2
3
4
5
data: function () {
return {
counter: 0
}
}

prop

1
2
3
4
5
6
7
Vue.component('child', {
// 声明 props
props: ['message'],
// 就像 data 一样,prop 也可以在模板中使用
// 同样也可以在 vm 实例中通过 this.message 来使用
template: '<span>{{ message }}</span>'
})
1
<child message="hello!"></child>

注意:组件在注册之后,便可以作为自定义元素在一个实例的模板中使用。注意确保在初始化根实例之前注册组件,child要挂在Vue实例里面才能用.

1
2
3
<div id="ten" class="normal">
<child message="hello!" class="normal"></child>
</div>

自定义事件

$on 和 $emit

$on — 监听事件
$emit — 触发事件

不能用$on监听子组件释放的事件,而必须用v-on

1
2
3
4
5
<div id="counter-event-example">
<p>{{ total }}</p>
<button-counter v-on:increment="incrementTotal"></button-counter>
</div>
1
2
3
4
5
6
7
8
9
10
11
12
13
14
15
16
17
18
19
20
21
22
23
24
25
Vue.component('button-counter', {
template: '<button v-on:click="incrementCounter">{{ counter }}</button>',
data: function () {
return {
counter: 0
}
},
methods: {
incrementCounter: function () {
this.counter += 1
this.$emit('increment') //触发increment,通过执行父组件方法改变父组件的值
}
},
})
new Vue({
el: '#counter-event-example',
data: {
total: 0
},
methods: {
incrementTotal: function () {
this.total += 1
}
}
})

绑定原生事件,加.native

1
<my-component v-on:click.native="doTheThing"></my-component>

slot

编译作用域

父组件模板的内容在父组件作用域内编译;子组件模板的内容在子组件作用域内编译。
所以,父组件并不感知子组件的状态

1
2
3
<!-- 无效 -->
<child-component v-show="someChildProperty"></child-component>
<!-- 该someChildProperty绑定在父组件上 -->

正确的应该是:

1
2
3
4
5
6
7
8
9
Vue.component('child-component', {
// 有效,因为是在正确的作用域内,写在子组件模板内作用域就在子组件
template: '<div v-show="someChildProperty">Child</div>',
data: function () {
return {
someChildProperty: true
}
}
})

单个插槽

1
2
3
4
5
6
<div>
<h2>我是子组件的标题</h2>
<slot>
只有在没有要分发的内容时才会显示。
</slot>
</div>
1
2
3
4
5
6
7
8
<!--父组件模板-->
<div>
<h1>我是父组件的标题</h1>
<my-component>
<p>这是一些初始内容</p>
<p>这是更多的初始内容</p>
</my-component>
</div>
1
2
3
4
5
6
7
8
9
<!--渲染结果-->
<div>
<h1>我是父组件的标题</h1>
<div>
<h2>我是子组件的标题</h2>
<p>这是一些初始内容</p>
<p>这是更多的初始内容</p>
</div>
</div>

多个插槽

1
2
3
4
5
6
7
8
9
10
11
<div class="container">
<header>
<slot name="header"></slot>
</header>
<main>
<slot></slot>
</main>
<footer>
<slot name="footer"></slot>
</footer>
</div>
1
2
3
4
5
6
7
<!--父模板-->
<app-layout>
<h1 slot="header">这里可能是一个页面标题</h1>
<p>主要内容的一个段落。</p>
<p>另一个主要段落。</p>
<p slot="footer">这里有一些联系信息</p>
</app-layout>
1
2
3
4
5
6
7
8
9
10
11
12
13
<!--渲染结果-->
<div class="container">
<header>
<h1>这里可能是一个页面标题</h1>
</header>
<main>
<p>主要内容的一个段落。</p>
<p>另一个主要段落。</p>
</main>
<footer>
<p>这里有一些联系信息</p>
</footer>
</div>

就是带name的指定位置插入,不带的插入剩下内容

又一个例子:

1
2
3
4
5
6
7
8
9
10
11
12
13
14
15
16
17
18
19
20
21
22
<!--slotDemo.html-->
<!DOCTYPE html>
<html lang="en">
<head>
<meta charset="UTF-8">
<meta name="viewport" content="width=device-width, initial-scale=1.0">
<meta http-equiv="X-UA-Compatible" content="ie=edge">
<title>Document</title>
</head>
<body>
<div id="parent-template">
<child>
此处是待分发的内容
<p slot="one">one</p>
<p slot="two">two</p>
<p>default</p>
</child>
</div>
<script type="text/javascript" src="vue.js"></script>
<script type="text/javascript" src="slotDemo.js"></script>
</body>
</html>

1
2
3
4
5
6
7
8
9
10
11
12
13
14
15
16
17
18
19
20
21
22
// slotDemo.js
// 注册子组件
Vue.component("child", {
template: `
<div v-show="absolute">
<h1>内容被分发且重新组合</h1>
<slot>默认分发处</slot>
<slot name="two">第二</slot>
<slot name="one">第一</slot>
</div>
`,
data: function(){
return {
absolute: true
}
}
});
// 初始化父组件
new Vue({
el: "#parent-template"
});

渲染结果:

可见slot是父插子,一切按照子模板顺序渲染

作用域插槽

1
2
3
<div class="child">
<slot text="hello from child"></slot>
</div>
1
2
3
4
5
6
7
8
<div class="parent">
<child>
<template slot-scope="props">
<span>hello from parent</span>
<span>{{ props.text }}</span>
</template>
</child>
</div>

结果

1
2
3
4
5
6
<div class="parent">
<div class="child">
<span>hello from parent</span>
<span>hello from child</span>
</div>
</div>

注意,查看Vue版本的两种方法

1
2
vue -V
# 查看的是webpack的全局vue版本,很高很高的


1
Vue.version # 才是vue.js文件的版本

低开销用v-once

1
2
3
4
5
6
7
8
9
//对很多静态内容缓存起来
Vue.component('terms-of-service', {
template: '\
<div v-once>\
<h1>Terms of Service</h1>\
...很多静态内容...\
</div>\
'
})